
Chef Takumi
Arare (あられ, small mochi rice crackers)
Arare begins as firm mochi, cut small and dried until patient enough to puff. Brush it with soy at the end, and the little hailstones turn crisp and savory.
A cooking platform built around craft, culture, and the stories behind what we eat.
Created by
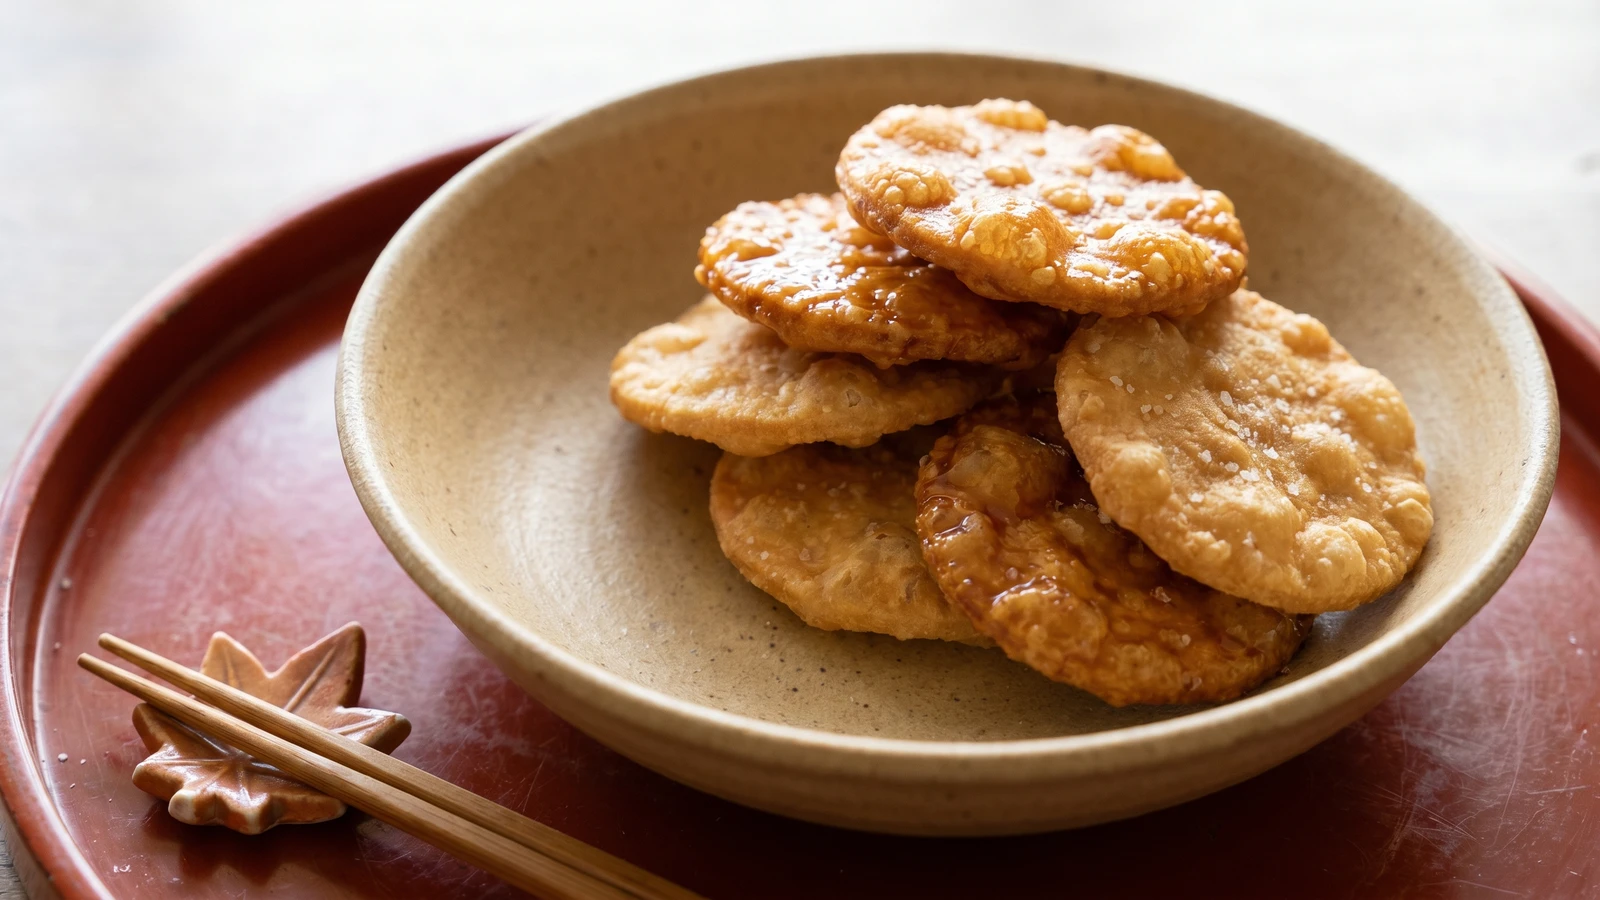
Age senbei are rice crackers with one plain demand: dry them well before they meet the oil. Do that, and they puff, blister, and take soy glaze like lacquer.
Arice cracker looks stern until you understand its one rule. It must be dry before it is fried. Not a little dry, not dry on the edges, but firm all the way through, so the oil can turn the trapped moisture into lift instead of making a heavy little tile. This is the detail that decides age senbei.
We make these from jōshinko, finely milled non-glutinous rice flour, because senbei should crack cleanly under the teeth. Mochiko would make something chewier, which is another road. Steam the dough first so the rice starch cooks through, knead it while warm, then roll it thin and let time do the patient work. Time is not a complication. It is the easiest cook in the room, and very punctual if you give it overnight.
The frying itself is brief. The discs go into hot oil, swell in patches, blister at the surface, and turn pale gold before you have much time to admire yourself. Brush them while they are still glistening warm, either with a simple shōyu tare, a soy glaze, or with salt. Nothing hidden. The rice gives the crackle, the oil gives the puff, and the seasoning only signs its name.
Rice senbei made from non-glutinous rice became closely associated with Sōka, in present-day Saitama Prefecture, during the Edo period, where crackers were sold to travelers along the Nikkō Kaidō road. The best-known style is grilled and brushed with soy sauce, but fried senbei grew as a later variation once household and commercial frying oil became more common. The word senbei itself is older than rice crackers and originally referred to wheat cakes that came through continental influence, before Japan made the form its own in rice.
Quantity
200g
Quantity
1/2 teaspoon
Quantity
170ml, plus 1 to 2 tablespoons if needed
Quantity
enough for 2 inches in a pot
Quantity
2 tablespoons
Quantity
1 tablespoon
Quantity
1 teaspoon
Quantity
1 teaspoon
Quantity
to finish
| Ingredient | Quantity |
|---|---|
| jōshinko (Japanese non-glutinous rice flour) | 200g |
| fine sea salt | 1/2 teaspoon |
| hot water | 170ml, plus 1 to 2 tablespoons if needed |
| neutral frying oil | enough for 2 inches in a pot |
| soy sauce | 2 tablespoons |
| mirin | 1 tablespoon |
| sugar | 1 teaspoon |
| water | 1 teaspoon |
| flaky sea salt (optional) | to finish |
Mix the jōshinko and fine salt in a heatproof bowl. Pour in the hot water a little at a time, stirring with chopsticks or a spoon until the flour gathers into damp, rough clumps. Rice flour takes water unevenly at first, so pause before adding more; you want a dough that presses together without smearing wetly across your fingers.
Break the dough into several lumps, set them on parchment in a steamer, and steam over steady heat for 20 minutes. Steaming cooks the rice starch fully before the crackers are shaped, which gives the finished senbei a clean crack instead of a sandy bite.
Tip the steamed dough into a bowl and knead it with a sturdy spoon, then with damp hands once it is cool enough to touch, 3 to 5 minutes. This makes the dough smooth and even, so the crackers dry and fry at the same pace. If it cracks badly, knead in a teaspoon of hot water at a time.
Roll the warm dough between two sheets of parchment to about 2mm thick. Cut into rounds or rough rectangles, then prick each piece once or twice with a skewer. Thin pieces dry more evenly, and the tiny holes keep large bubbles from tearing the cracker open in the oil.
Lay the pieces on a rack in a single layer and let them dry uncovered overnight, 10 to 12 hours, turning once. They should feel firm and pale, with no cool dampness at the center. This drying is not decoration; it is what lets the cracker puff and blister instead of absorbing oil.
Combine the soy sauce, mirin, sugar, and teaspoon of water in a small pan. Warm just until the sugar dissolves, then take it off the heat. The tare should be glossy and salty-sweet, strong enough to season the rice without soaking it.
Heat 2 inches of oil to 170°C to 175°C, or 340°F to 350°F. Fry 4 or 5 crackers at a time, turning them as they puff and blister, 45 to 75 seconds. Pull them when they are pale gold. Too cool, and they drink oil; too hot, and the outside darkens before the inside has lifted.
Drain the crackers on a rack, then brush lightly with the soy tare while they still glisten from the oil. For salt senbei, skip the tare and sprinkle with flaky salt at once. Seasoning while warm helps it cling in a thin layer, which is what you want: rice first, seasoning second.
Let the senbei cool completely on the rack before eating or storing. They crisp as they cool, so don't rush them into a tin. Any trapped warmth softens the surface you worked to make crisp.
1 serving (about 12g)
Culinary guides, cultural storytelling, and the editorial depth that makes cooking meaningful.
Discover Culinary ExplorerChef Takumi
Arare begins as firm mochi, cut small and dried until patient enough to puff. Brush it with soy at the end, and the little hailstones turn crisp and savory.

Chef Takumi
Chocolate shu cream is judged twice: first by the hollow shell, then by the custard. Dry the dough properly, choose chocolate with backbone, and the little puff behaves.

Chef Takumi
Start with the lightest choux: tiny unfilled puffs, properly dried over heat, loosened with eggs, and baked until the shell lifts hollow under a coat of pearl sugar.

Chef Takumi
Zarame senbei is not a cookie wearing a Japanese coat. It is a rice cracker, dried well, baked crisp, brushed with soy, then caught while hot with coarse sugar.