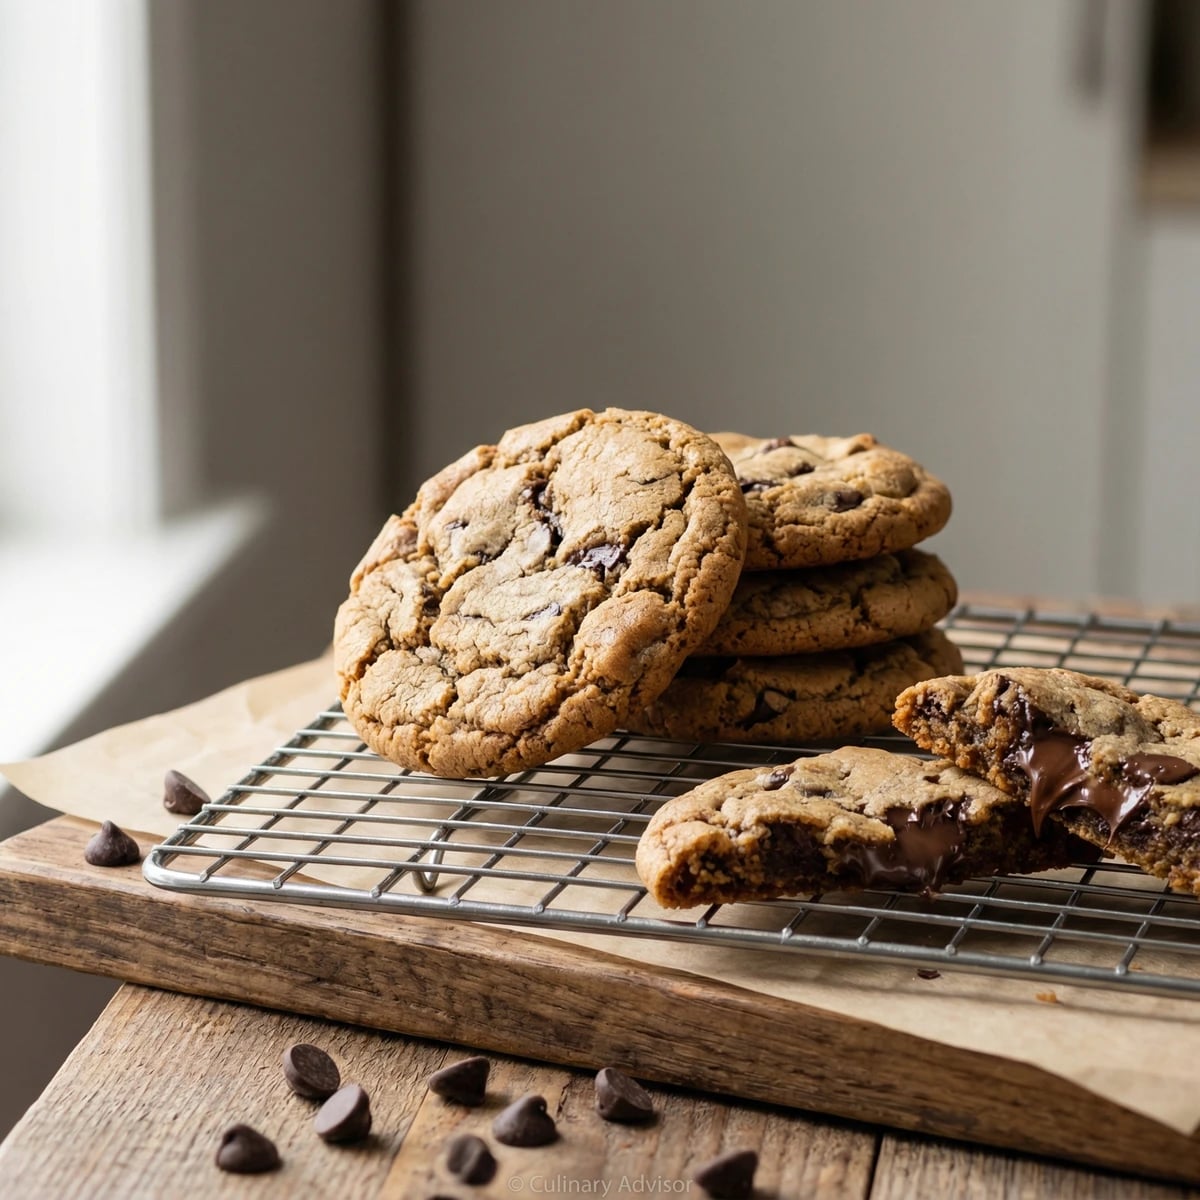
Dark chocolate chip cookies with a secret weapon: instant espresso that deepens chocolate flavor without announcing itself. Crisp edges, chewy centers, and a complexity that keeps people guessing.
Pastries & Cookies
American
Make Ahead
Dinner Party
25 min
Active Time
12 min cook•24 hr 45 min total
Yield24 cookies
Here's a trick French pastry chefs have known for generations: a small amount of coffee amplifies chocolate the way salt amplifies everything else. The espresso in these cookies doesn't make them taste like coffee. It makes them taste more intensely, profoundly of chocolate. Most people who eat these can't identify what makes them different. They just know they want another one.
The Toll House cookie Ruth Wakefield invented in 1938 was a happy accident, chocolate chunks that refused to melt into the dough. What she stumbled upon became America's most beloved cookie. This version honors her creation while pushing it somewhere more sophisticated. The brown butter adds nuttiness and depth. The espresso powder dissolves into the dough and disappears, leaving only its amplifying effect behind.
I've served these at dinner parties where guests assumed they came from a bakery. They didn't. They came from a home kitchen, a stand mixer, and the understanding that great cookies require the same attention as any other worthy dish. The technique isn't complicated. Brown your butter, let your dough rest, don't overbake. Follow through on these three points and you'll produce cookies that rival anything you've purchased.
The technique, the tradition, and the story behind every dish.
dark chocolate chips or chopped chocolate (60-70% cacao)
Quantity
10 ounces (285g)
Ingredient
Quantity
all-purpose flour
2 cups (250g)
baking soda
1 teaspoon
fine sea salt
1 teaspoon
instant espresso powder
1 tablespoon
unsalted butter
1 cup (2 sticks/225g)
dark brown sugarpacked
1 cup (200g)
granulated sugar
1/2 cup (100g)
eggs, room temperature
2 large
pure vanilla extract
2 teaspoons
dark chocolate chips or chopped chocolate (60-70% cacao)
10 ounces (285g)
Equipment Needed
•Stand mixer with paddle attachment (or hand mixer)
•Light-colored saucepan for browning butter
•Cookie scoop (#30/2 tablespoon size)
•Rimmed baking sheets
•Wire cooling rack
Instructions
1
Brown the butter
Cut butter into tablespoon-sized pieces and place in a light-colored saucepan over medium heat. The light color matters because you need to see the browning happen. Swirl occasionally as the butter melts, foams, and begins to sputter. Watch the milk solids at the bottom. They'll turn from white to golden to amber. The moment you smell something nutty and toasted, pull the pan from heat. This takes 5 to 7 minutes. Pour immediately into a heatproof bowl to stop the cooking.
Brown butter can go from perfect to burnt in seconds. Stay at the stove and trust your nose more than your eyes.
2
Bloom the espresso
While the butter is still hot, whisk in the instant espresso powder until completely dissolved. The heat helps the espresso bloom and distribute evenly through the fat. Let this mixture cool to room temperature, about 20 minutes. You can speed this by placing the bowl in an ice bath, stirring occasionally.
3
Combine dry ingredients
In a medium bowl, whisk together the flour, baking soda, and salt. Set aside. Whisking aerates the flour and ensures the leavening distributes evenly, which matters more than most recipes acknowledge.
4
Cream butter and sugars
Add both sugars to the cooled brown butter. Beat with a stand mixer fitted with the paddle attachment on medium speed until combined and slightly lightened, about 2 minutes. The mixture won't get fluffy like room-temperature butter would. That's expected. You're building flavor, not volume.
The higher ratio of brown sugar creates chewiness. White sugar contributes crispness and spread. This balance gives you the best of both.
5
Add eggs and vanilla
Add the eggs one at a time, beating well after each addition until the mixture looks glossy and emulsified. Scrape down the bowl between eggs. Add the vanilla with the second egg. The dough should look smooth and somewhat ribbony when you lift the paddle.
6
Incorporate dry ingredients
Add the flour mixture all at once. Mix on low speed just until no dry streaks remain. Stop the moment it comes together. Overworking develops gluten, which makes tough cookies. A few small flour pockets are better than a overbeaten dough.
7
Fold in chocolate
Add the chocolate chips and fold with a rubber spatula until evenly distributed. Use chocolate you'd be happy eating straight from the bag. The cookie is a vehicle for the chocolate as much as the chocolate is an addition to the cookie.
8
Rest the dough
Cover the bowl tightly with plastic wrap and refrigerate for at least 24 hours, up to 72 hours. This rest is not optional. The flour hydrates fully, the sugars dissolve into the butter, and the flavors deepen considerably. Cookies baked from rested dough spread less, develop better texture, and taste noticeably more complex.
The famous New York Times chocolate chip cookie recipe taught a generation of bakers about the power of resting dough. This technique has science behind it: enzymatic browning and starch hydration create a superior cookie.
9
Portion and bake
Heat your oven to 350°F (175°C). Line baking sheets with parchment paper. Scoop dough into 2-tablespoon portions (a #30 cookie scoop works perfectly). Arrange on sheets with 3 inches between each cookie. These spread. Bake one sheet at a time in the center of the oven for 10 to 12 minutes. The edges should be set and golden while the centers still look slightly underdone and puffy.
10
Cool properly
Let cookies rest on the baking sheet for 5 minutes. They continue cooking from residual heat and need this time to set up. Transfer to a wire rack to cool completely. Resist the urge to eat one immediately. They're better after 10 minutes when the chocolate has firmed slightly and the texture has settled. Then eat one immediately.
If you broke one open and the center looks gooey, you did it right. They firm as they cool.
Chef Tips
•Use a quality instant espresso powder, not regular instant coffee. Espresso powder dissolves completely and provides intensity without bitterness. Medaglia d'Oro and King Arthur's espresso powder both work beautifully.
•Chopped chocolate from a bar creates those dramatic chocolate pools and shards better than uniform chips. Use a mix of both if you want visual interest with reliable distribution.
•For bakery-style thickness, chill portioned dough balls for 30 minutes before baking, even after the initial 24-hour rest.
•These cookies pair remarkably well with a glass of bourbon or a shot of actual espresso. The flavors mirror and amplify each other.
Advance Preparation
•Dough must rest at least 24 hours before baking. It improves up to 72 hours refrigerated.
•Portioned dough balls freeze beautifully for up to 3 months. Freeze on a sheet until solid, then transfer to a freezer bag. Bake directly from frozen, adding 2 to 3 minutes to the baking time.
•Baked cookies keep in an airtight container at room temperature for 5 days, though they rarely last that long.
•To refresh day-old cookies, warm them in a 300°F oven for 3 minutes. The chocolate re-melts and they taste freshly baked.
Frequently Asked Questions
Nutrition Information
1 serving (about 40g)
Calories
260 calories
Total Fat
13 g
Saturated Fat
8 g
Trans Fat
0 g
Unsaturated Fat
5 g
Cholesterol
10 mg
Sodium
96 mg
Total Carbohydrates
24 g
Dietary Fiber
1 g
Sugars
15 g
Protein
2 g
Where cooking meets culture.
Culinary guides, cultural storytelling, and the editorial depth that makes cooking meaningful.