Chef Dean
Bakery-Style Blueberry Muffins
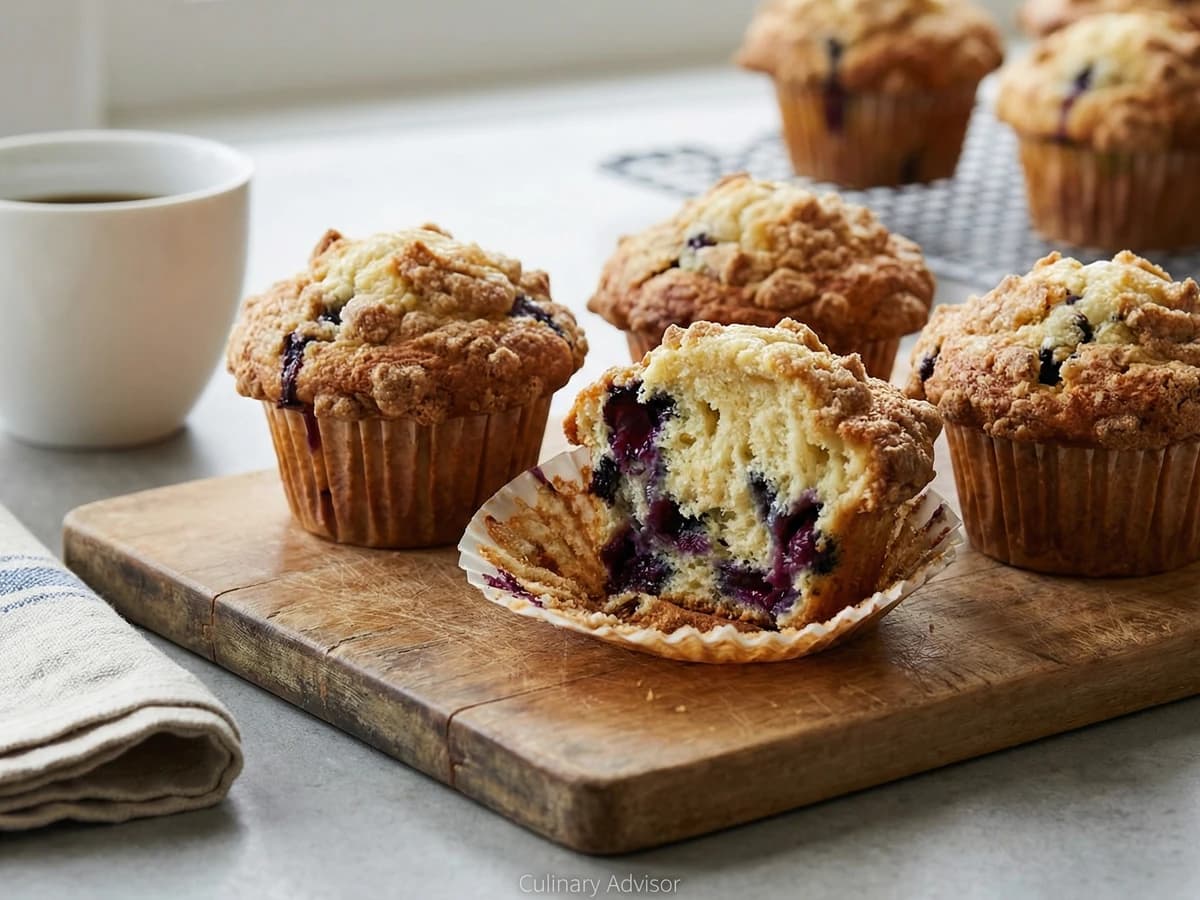
Sky-high muffins bursting with juicy blueberries beneath a shatteringly crisp butter streusel, baked golden brown with that coveted bakery dome your family will wake up early for.
A cooking platform built around craft, culture, and the stories behind what we eat.

Created by
Pillowy soft sandwich bread from Pennsylvania Dutch kitchens, where generations of home bakers perfected the art of tender, slightly sweet loaves that slice clean and toast golden.
The Amish and Mennonite communities of Lancaster County have been baking this bread for centuries. It predates sliced bread by a hundred years, yet remains the ideal vehicle for it. Two ingredients distinguish this loaf from ordinary white bread: whole milk for tenderness and a touch of sugar for that faint sweetness that makes it irresistible warm from the oven.
This is not artisan bread. It makes no pretense of crusty exteriors or open crumb. What it offers instead is honest utility: a loaf that holds together for sandwiches, absorbs soup without disintegrating, and transforms into the finest French toast you've ever tasted. The Pennsylvania Dutch understood something essential about bread. It should serve the meal, not demand attention.
I've watched Amish bakers work this dough by feel, never measuring, adjusting flour by the handful until it feels right. You'll develop that instinct too. For now, I've given you weights alongside volumes. The weights are more reliable. Use them until your hands know what properly hydrated dough should feel like: smooth, slightly tacky, and alive with the energy of working yeast.
Quantity
2 cups (480ml)
warmed to 110°F
Quantity
2/3 cup (135g)
Quantity
1 tablespoon (9g)
Quantity
1/3 cup (75g)
softened
Quantity
1 tablespoon (18g)
Quantity
6 to 6 1/2 cups (750-815g)
Quantity
for brushing tops
| Ingredient | Quantity |
|---|---|
| whole milkwarmed to 110°F | 2 cups (480ml) |
| granulated sugar | 2/3 cup (135g) |
| active dry yeast | 1 tablespoon (9g) |
| unsalted buttersoftened | 1/3 cup (75g) |
| fine sea salt | 1 tablespoon (18g) |
| all-purpose flour | 6 to 6 1/2 cups (750-815g) |
| softened butter (optional) | for brushing tops |
Warm your milk to 110°F. This matters. Too cool and the yeast sleeps. Too hot and you kill it. Use a thermometer until you can gauge temperature by touch. Pour the warm milk into a large mixing bowl and stir in the sugar until dissolved. Sprinkle the yeast over the surface and let it rest for 5 minutes. You're looking for foam and bubbles forming on top. This tells you the yeast is alive and hungry. If nothing happens after 10 minutes, your yeast is dead. Start over with fresh yeast.
Add the softened butter and salt to the yeast mixture, stirring until the butter melts into streaks throughout the liquid. Add 3 cups (375g) of flour and beat vigorously with a wooden spoon for 2 minutes. This develops gluten before you add the remaining flour. The mixture should look like thick pancake batter with long strands pulling from the spoon. Add flour one cup at a time, stirring after each addition, until the dough becomes too stiff to stir. You'll use between 6 and 6 1/2 cups total, depending on humidity and how you measured.
Turn the shaggy dough onto a floured surface. Now you work. Knead by pushing the heel of your hand into the dough, folding it over, rotating a quarter turn, and repeating. Add flour sparingly when it sticks to your hands. After 8 to 10 minutes of steady kneading, the dough transforms. It becomes smooth and elastic, bouncing back when you poke it. The surface should feel like a baby's cheek: soft, smooth, with just the faintest tack. This is called the windowpane stage. Pinch off a small piece and stretch it thin. If light passes through without tearing, you've developed enough gluten.
Grease a large bowl with butter or oil. Place the dough inside and turn it once to coat all surfaces. Cover tightly with plastic wrap or a damp kitchen towel. Set it in a warm spot, around 75-80°F. The top of your refrigerator works. So does an oven with just the light on. Let the dough rise until doubled in bulk, about 1 to 1 1/2 hours. Don't rush this. The yeast is producing carbon dioxide and alcohol, both of which create flavor and texture. Poke the dough with your finger. If the indent stays, it's ready. If it springs back, give it more time.
Punch down the risen dough with your fist. This isn't violence; it's redistribution. You're popping large gas bubbles to create a finer, more uniform crumb. Turn the dough onto a clean surface (no flour needed now) and divide it in half. A kitchen scale ensures equal loaves. Working with one piece at a time, pat it into a rough rectangle about 8 by 12 inches. Starting from a short end, roll the dough tightly toward you, pressing gently to seal each turn. Pinch the seam closed. Tuck the ends under and place seam-side down in a greased 9x5-inch loaf pan. Repeat with the second piece.
Cover the pans loosely with plastic wrap or a towel. Let them rise in that same warm spot until the dough crowns about 1 inch above the rim of the pan. This takes 45 minutes to 1 hour. The dough should look puffy and feel pillowy when gently pressed. While the loaves rise, position your oven rack in the center and preheat to 350°F. Give the oven a full 20 minutes to stabilize.
Place both pans in the oven with at least 2 inches of space between them for air circulation. Bake for 25 to 30 minutes. The loaves are done when the tops turn deep golden brown and the internal temperature reaches 190°F. Here's the old baker's test: tip a loaf out of the pan and tap the bottom. It should sound hollow, like knocking on a door. If it thuds, it needs more time. Return it to the pan and bake 5 minutes longer.
Remove the loaves from pans immediately and place on a wire rack. Brush the tops with softened butter while still hot. This creates a soft, glossy crust. Now comes the hardest part: waiting. The bread continues cooking as it cools, and the crumb sets during this time. Cutting too soon produces a gummy interior and compressed slices. Give it at least 30 minutes, preferably an hour. The aroma will test your patience. Stay strong.
1 slice (about 60g)
Culinary guides, cultural storytelling, and the editorial depth that makes cooking meaningful.
Discover Culinary ExplorerChef Dean
Sky-high muffins bursting with juicy blueberries beneath a shatteringly crisp butter streusel, baked golden brown with that coveted bakery dome your family will wake up early for.

Chef Dean
Pillowy enriched dough wrapped around jammy wild blueberries and fragrant lemon zest, then crowned with a tangy cream cheese glaze that pools into every golden crevice. Summer morning baking at its finest.

Chef Dean
Golden, buttery buns with a tender crumb that cradles your burger without surrendering to the juices. This is the bun that makes a backyard cookout feel like an occasion worth remembering.

Chef Ally
A loaf born from what most people discard: those too-brown bananas on your counter transformed by the nutty depth of browned butter and the crunch of toasted walnuts.